Showing posts with label Subject Sigma. Show all posts

Tuesday, November 30, 2010

Subject Delta–Part 2–Begin the Creepy Bit

To quote another costume/replica maker, and an idol, Harrison Krix:
”The Little Sisters from Bioshock are among the creepiest characters I've ever seen in a videogame.”  I couldn’t have said it better.

little%20sister[1]

3272169385_0e9ceb8ec7[1]

A lot of the Big Daddy costumes I’ve seen have used other people as the Little Sister.  I thought about volunteering Melinda for this, but to be honest, I don’t think she could ever be creepy enough.  Plus it throws the whole scale off.  I need a Little Sister that is creepy and the right scale.  I thought about borrowing a niece or god-daughter or maybe a friends kid, but the idea of carrying them around on my back all day really didn’t appeal to me.  Plus, it is my understanding that you have to feed real children and they get really whiney when they get tired and it all just sounded like too much trouble.  The requirements then became that she had to be:
- lightweight
- able to stay up late
- not need food
- articulated
- glowing eyes
- creepy (some will come from the audio from the earlier post)
To get this, I was going to have to make something.  Off to the basement again.  This is where this is going to get strange, even for me, I went to the basement to make a creepy little girl.  *sigh*

I thought about just trying to use some sort of a large doll.  The only issues there were:
- every doll I’ve ever seen looks like a doll.  No matter what, it always looks like a doll.
- every doll I’ve ever seen creeps me out beyond belief.

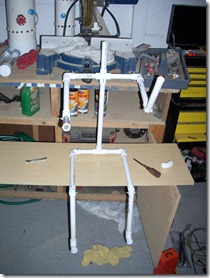
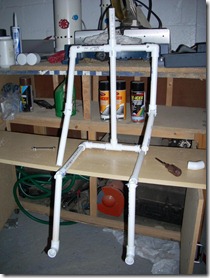
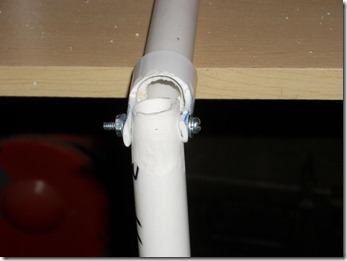
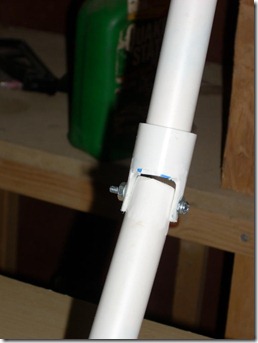
To get the requirements, I started with the skeleton.  Simple half inch PCV pipe.  I cut the joints to provide room for movement and secured them with screws.  I jointed the knees, hips, shoulders, and elbows.  What I got was a really cool PVC skeleton that I will then skin with Styrofoam and carve into shape.  I’ll make her head out of the green foam used in flower arrangements.  It’s light and can be easily carved.  Then it will just be running some wires and LEDs for the eyes.  I’m hoping it turns out well and gives me the creepy factor I’m going for.  So far, it has been giving us a lot of laughs just in the whole irony of the situation.

11 - Skeleton Done12 - Skeleton Moves

Knee Joint
13 - Knee Joint
Elbow Joint
14 - Elbow Joint

Subject Delta–Part 1a

Yeah, I know part 1a is kind of lame, but it is a continuation of part one in that it involves the final work of the tanks.

Background – The game of Bioshock is set in a submerged city called Rapture.  It is a ruined city and creates one of the best atmospheres in all of video games.  Part of that atmosphere is created by the soundtrack.  You’re trapped in this ruined decaying city and the background is all this creepy happy music from the 30’s and 40’s.  Add in the moans and groans of a Big Daddy and the twisted dialog of a Little Sister, and you’ve got a great recipe for just plain eerie.  This creepy feeling is something that I wanted to try to capture with this costume.  I knew I had to work in the soundtrack somehow.

There are two official soundtracks for the Bioshock games, one for each, so the music wasn’t hard to come by.  The sounds of the Little Sisters and Big Daddies was tougher.  Fortunately, one day at Target, I found a Bioshock 2 DVD for the PC.  A little time playing with the files and I had mp3s of both characters.  Now to mixing.

I picked out some of my favorite songs that should be easily recognizable if you’ve played the game and randomly threw in Big Daddy groans and Little Sister monologues.  Personally, I think it worked.  I ended up with a 20 minute mp3 that I could play to create my own soundtrack.  Now, on to playing it with the costume.

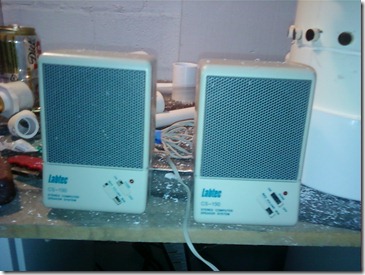
The player was easy, I have an iPod nano that I rarely use.  It was the speakers that were throwing me.  Until I remembered that because I am a packrat, I still had the first set of computer speakers I ever bought, and they happened to be battery powered.

7 - Speakers

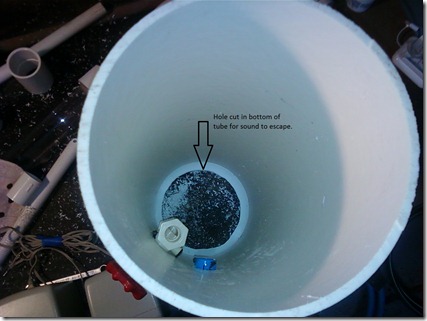
I was hoping they would fit in the smaller tank since the bottom of it is a drain style plug, so the grid would allow the sound to escape.  Unfortunately, they didn’t.  They do fit great in the big tank, but when it is closed, you lose most the sound.  Open, it sounds even creepier, which is just awesome.  This left me with no choice but to cut a hole in the bottom of the big tank.

8 - Speaker Home - Detail

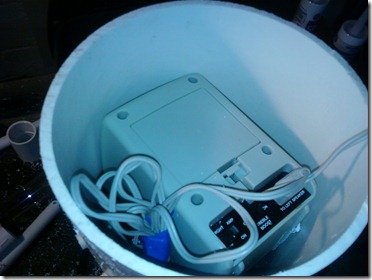
That one fixture protruding in the tank made a great support for the speakers, by the way.

9 - Speakers in Home

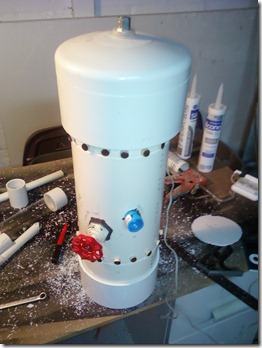
10 - All Closed Up

I will be making a hole for the audio cord making sure it is completely hidden.  That will likely happen once I get the final back pack fixed for these monsters.

Wednesday, November 17, 2010

Subject Delta–Part 1

On the subject of costuming, I have already gotten too many ideas to work with. I want to do a v2 of my Destro mask, Subject Sigma, and now Fable 3’s King of Albion. Oh, and if Melinda decides on a costume, I’ll be making it too. Having projects running parallel like this is nice in that when I get stuck, I can switch gears to another project until I come up with a solution. It’s November right now, and I have already gotten a start on my Subject Sigma costume.

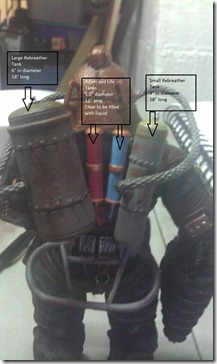
I got my new work area set up thanks to a weekend with a giant dumpster and chucking years of crap out of the basement. First thing was Subject Sigma. I actually have the Subject Delta action figure and since Delta and Sigma are from the same series of Big Daddies, I have a scale model to work off of. First thing I thought to create would be the tanks on the back. There are 4 distinct tanks, two for the re-breather, 1 for health, and one for eve.

2a -Goal - Detail

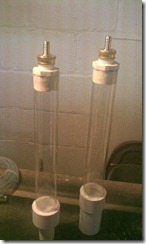
I’m trying to keep this as proportionally accurate as I can, so I am treating the action figure as though it were to scale for my height, 6 feet. Once I’ve established that, I did measurements of the tanks to come up with their sizes. Lots of tracing on paper really. I came up with the largest tank being 6 inches in diameter by 18 inches long. The smaller tank is 4 inches in diameter by 18 inches long. The angle they are mounted at makes them look different lengths, but they are actually the same. The two smaller tanks were harder to do since they needed to be clear, sealed, and later filled with red and blue liquid. So I was limited to what I could find in their diameter, but was able to get the 12 inch length set.

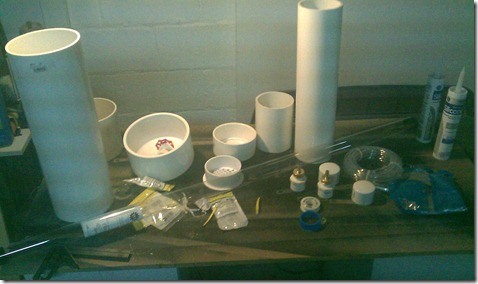
One trip to Lowes later and I had my supplies.

1 -Various Plumbing

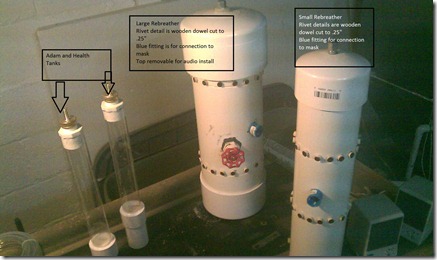
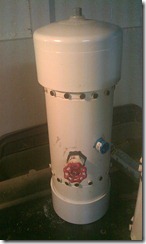
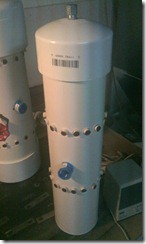
I didn’t seal the two big tanks with PVC glue, simply because I knew I would need to get back into them later for other developments. Each of the large tanks also had rivet points on them. One wooden dowel rod cut into rivet size and glued on should make the desired effect.

3a - Final Group Detail

4 - Life and Adam5 - Large Rebreather6 - Small Rebreather

All in all, I am really pleased with the way the tanks have turned out. Next step will be building my Little Sister and working the audio portion of the costume.