Wednesday, May 2, 2012

Star Wars Lightsaber Hilts


First things first.  According to my Blogger Dashboard, I now have two new followers!  Bringing my total up to a mind blowing three!

Still, I want to say thanks to my new followers and that I hope you enjoy this and future write ups.

Now on to what you came here for.


I try to make project plans and outlines.

I try to stick to them.

I fail miserably every time.

Oh, well.

Our friends, David and Lori, are going to Dragon*Con with us this year!  At last we’ll have friends there to hang out with and share in the fun and all things Dragon*Con (hopefully not the diseases, though).  Once they had their room booked and memberships bought, we started talking about cosplay ideas, and we decided that we had to do a group cosplay.  David mentioned Star Wars, and before Melinda and I even got home, I had ideas and plans in my head.  We’ve never done a Star Wars cosplay, which was very shocking and depressing.  So, now I get to check another item off the bucket list: Do a Star Wars cosplay.

I decided that step #1 should be creating lightsabers for everyone.  This was also a tricky decision.  If I make just a lightsaber hilt, then it will be easier and more convenient to carry around.  If I make lightsabers with blades, then we all have to walk around carrying a 32” long blade with us through the crowds of D*C.  I ended up going with just the hilts.  I am trying to figure out a way to make a removable blade that can be carried in our robes and then attached when needed.  I’m still working on that and if it works out, I’ll update accordingly.

Once I decided on just the hilts, it was time to design.  Melinda and I of course wanted to be Sith.  The bad guys just have so much more fun, and as David Prowse told us: “Everyone remembers the villain”.  Melinda decided to cosplay Asajj Ventress in her Nightwitch costume from the last season of Clone Wars.  I’ve created a character for myself to go as named Darth Equiness.  He is a more primitive Sith in a full face mask (that build is coming in a later blog).  David and Lori will be the Jedi to balance our team out.

Now, I have never built lightsabers before, but I know I should have started there.  I decided on the PVC pipe route.  Easy to find, easy to work with, and something I know all too well.  Melinda helped me decide that her and Lori’s hilts would be made from 1/2” PVC and mine and David’s would be from 3/4” PVC.  Why the different sizes?  Easier and more comfortable to hold, according to Melinda.  Now to fire up the Dremmel.

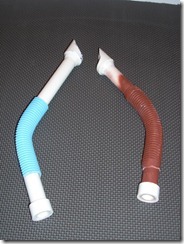
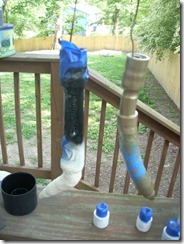
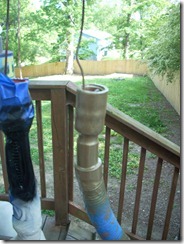
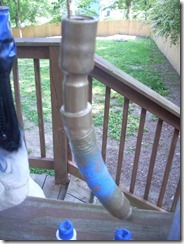
I started with Melinda and Lori’s sabers.  I decided that Lori’s should be a bent foil/fencing style, not as extreme as Ventress’s but similar.  Heat gun + PVC + time = bent into shape.

IMAG0535

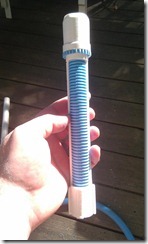
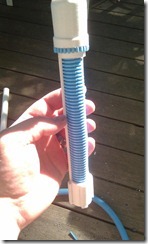
I took some blue PVC flexible conduit to make the grips.  Cutting it down the middle so it would slip over the PVC pipe.  A little heat gun blast made this a lot easier.

DSCN0374

Here you can see where I got excited on the second Ventress saber and forgot that I had adjusted the size on the first one, cutting is slightly shorter.  Do over time.

The top and pummels are simply PVC fittings cut and sanded to shape with the Dremmel.

IMAG0537

Here in the line up from left to right is Lori’s, Melinda’s dual sabers, and mine.  As you can see, I went back and fixed the length issue.

The grey bits is simply epoxy sculpt used to fill in the gap that the slide on grip left. 

Now you may be wondering, where’s David’s?  This was the most intimidating build I’ve ever done.  David is a designer and a creative person, too.  So, I’m trying to create something for a fellow artist.  It would be like an author you respect coming to you and asking you to write them a story.  What the heck do I do?  Well the first one that I tried simply ate itself.  So, I went back to the others and got them painted and ready.

DSCN0383DSCN0384

They weren’t supposed to be that silver.

DSCN0385

And that was supposed to be more bone like in color.

DSCN0386DSCN0387

At least the hammered gold came out right.

Enough futzing around, time to build David’s.

I went with a classic saber design.  No reason not using what we know works.

IMAG0555IMAG0556

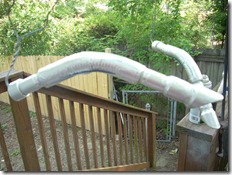
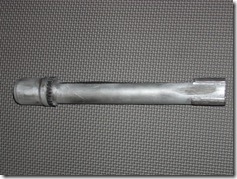
For this one, I actually cut out a “window” in the PVC pipe, then cut a small section out of the conduit, heated the conduit, and slipped it up inside the PVC pipe.  The details at the bottom are simply sections of the piece that was removed to make the grip area, cut down and glued in place.  The transition bit at the top is simply a narrow cut of the conduit.

Now back to painting, painting and more painting, until we get :

DSCN0391DSCN0392DSCN0396
DSCN0401DSCN0402DSCN0403
DSCN0404DSCN0405

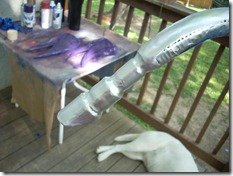
The distressing and aging effect was done with multiple layers of paint and then removed with steal wool and then, in some cases, hand painted back in with a stiff dry brush.

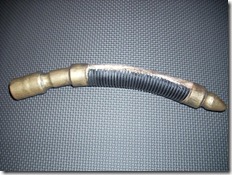
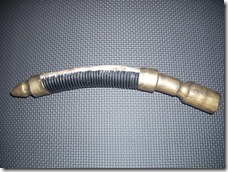
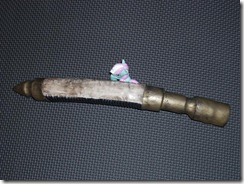
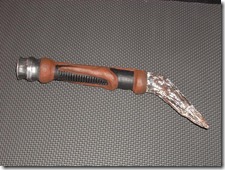
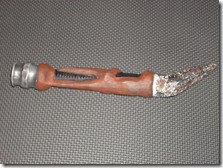
Lastly my saber.  I created a character that I will be cosplaying.  A Sith Lord named Darth Equiness.  He is a rather primitive character and I needed a saber unlike any other.  This involved a lot of hand painting.  So much hand painting.
DSCN0769DSCN0770DSCN0771

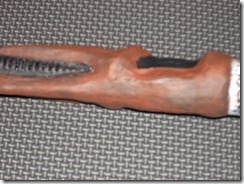
Initially the wood detail was going to be bone, but for some reason when I went to paint this, I picked up dark brown paint.  It started to look like wood and reminded me of a wand from Harry Potter.  PERFECT!  So I continued to create a wood like texture.  All the wood detail is made up of epoxy sculpt over PVC pipe.

The pummel was always to be a tooth/bone/claw detail.  Turns out, creating a bone color is really hard.  I like how it turned out so far.

The bend is just a 45 degree PVC elbow, a short bit of pipe and then a dowel sharpened to a point.  It has a physical texture that I created by covering it with a counter top caulking. 

There we have it.  5 Lightsaber hilts built in less than 2 weekends.  I’d say there is probably just over 12 hours in all 5.  I like quick props like these.
Thursday, March 29, 2012

Wedding Dessert Stand


Quick announcement – I am no longer going to be doing monthly updates to this blog.  I’m tired of doing WIP posts and then having all my builds spread over numerous entries.  I will simply be doing project completion posts from now on.  This means that when I finish, say the ASHPDs, I will make one post detailing the complete build process.  I may even go back and consolidate several posts into one, especially the Destro build.  So, no more monthly updates; simply project completion posts from now on.


The Wedding Dessert Stand

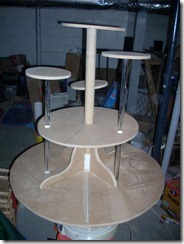
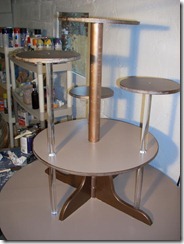
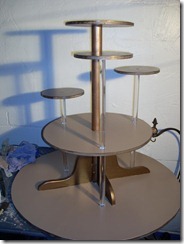
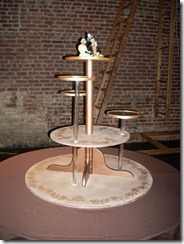
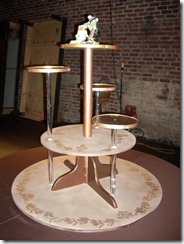
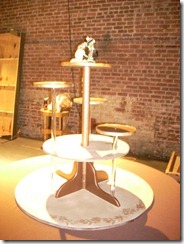
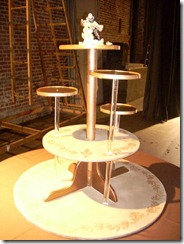
Two of my very best friends recently got married and they asked me to build them a cake/cookie/tart/dessert stand thing.  They aren’t real big fans of cake, so a traditional wedding cake was right out, but they still needed something cake-ish looking that meshed with their overall vision of the wedding, to hold the actual wedding desserts on.  I was incredibly honored that they would ask me to build something this important.  I had plenty of time to build it, but due to my complete lack of focus and poor time management abilities, I actually got caught up in other projects, and ended up working on this one until midnight the day of the wedding.  I was still able to get it done and ready for use though, but just barely.  Lesson learned: When someone asks you to build something very important and you have a clear deadline, put other projects on hold and focus on this one.

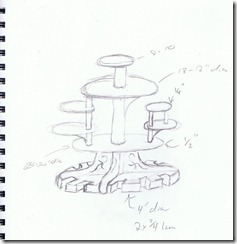
After an afternoon of talking about what they wanted and a few quick sketches, I came up with this design.
Cake-Cookie-Tart Thing

The wedding was going to take place in the Bijou Theatre, here in Knoxville.  It is a beautiful and old theatre, so their entire wedding look was what some might call Steam Punk, but I thought it was just more vintage (not enough copper tubing and gears for true Steam Punk).  The over all design, as you can see was for three main tiers and a few floating tiers.  The very top was reserved for their “cake topping monsters”.  Now with a design, off to the hardware store.


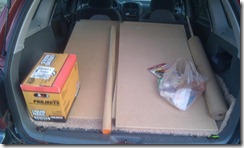
IMAG0484

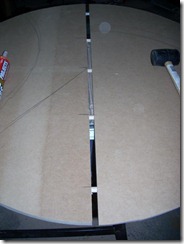
A few sheets of 2’x4’ MDF, some dowel rods, and a case of liquid nail.  I had originally intended for the whole structure to be modular for quick break down and reassembly.  Intentions often change.

DSCN0240

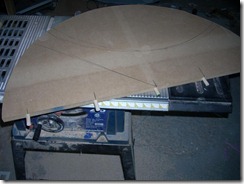
One half of the base with dowel rod pieces to join to the other half.

DSCN0241

Umm…they didn’t line up exactly as I had planned, so a bigger hammer was needed, and the modular base flew out the window.

DSCN0243

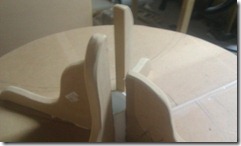
Both halves glued together and the support pieces glued in place.  The center bit is a section of PVC piping.  The central dowel rod fits in it perfectly and allowed me to secure it in place with screws.

IMAG0492IMAG0493

If you’ve been viewing my blog for any time, you may notice the lack of kitties in the background of my workshop.  That is because they are all upstairs with us now.  We’ve still got Leo and Remus available for adoption is anyone is looking for a kitty.

DSCN0251

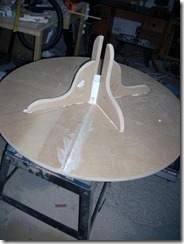
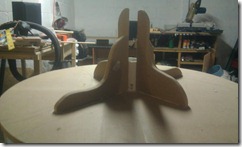
This was the first rough assembly.  Nothing was leveled or balanced.  I just wanted to see if it would even work.  I got the clear acrylic rods from TAP Plastics online.  Great company with a good selection, reasonable prices and fast shipping.  I ordered a lot of material from them for other projects coming up.

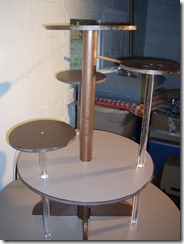
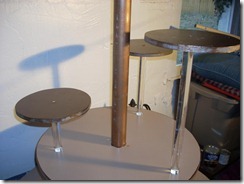
Next came sanding, bondo, sanding, sanding and eventually painting.

DSCN0295DSCN0296DSCN0298DSCN0294

Still some fine tuning to go, too, but we’re getting close.
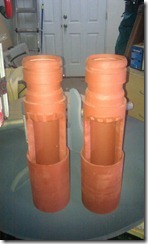
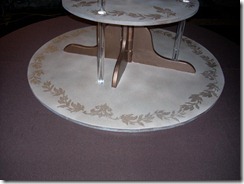
I also wanted to add some filigree style details to the piece, but when I tried, I failed miserably.  The paint just didn’t work and ended up bleeding into the base coat.  This happened on Saturday.  The wedding was Sunday, as in the next day.  We had the reception dinner that Saturday night, too.  So, no time to fix that big of a screw up if I didn’t get on it and stop moaning about it.

Fast trip to the hardware store again for spray paint (thank god it was sunny, warm and dry that day), hopefully some stencils, and better paint for the details.

More sanding to remove my screw up and no, I don’t have pictures of what the screw up looked like.  Just trust me, it was bad.
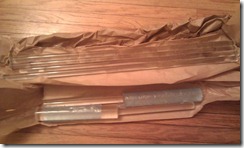
Finally around midnight everything was done, and I was actually pleased with it.  Last thing was to move it to the Bijou Sunday morning.  Naturally two things happened Sunday morning.  It was raining and I made the whole structure one half inch too tall to fit in the back of my Santa Fe. 

Fortunately, I could take out the central column by unscrewing it from the PVC collar.  Throw the drill, extra screws, brushes, paint, and glue into what I dubbed the “OHSHIT” bag, and off we went.

DSCN0306DSCN0307DSCN0308DSCN0310DSCN0311DSCN0309

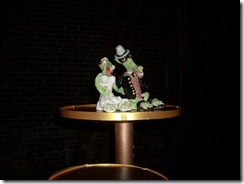
All in all, I think it turned out great.  I was a nervous wreck until I heard my friends say they loved it.  That was all the approval that it really needed.  I am my own worst critic, after all.  The monster cake topper was made by another of their friends and fit in perfectly.

Monday, February 27, 2012

February Catch Up


So, I completely blew my once a month update schedule last month.  My bad.  I just don’t know what happened.

Actually I do know what happened.  There just wasn’t much to write about.  Sometimes that happens.  Weather and real life events kept me away from doing a lot of work.

However, between January and February I have managed to get a lot of work done.  Some equal parts planning and design and actual building.

Costume Updates!

For 2012, I am sorry to announce that Bioshock will not be making a return.  I have managed to do something to my right arm, I have no idea what, but it causes me a lot of pain and muscle fatigue.  I cannot see any way for me to be able to carry another Subject Delta drill around for hours.  Even typing after a while becomes painful at the elbow and shoulder, so lugging around over five pounds of drill is right out.
Along with that, Eleanor is also out.  Melinda just doesn’t want to do the Eleanor costume if I’m not doing the Delta costume. So no Bioshock this year, but with Bioshock Infinite coming out, maybe we’ll get a revisit next year.  I keep hearing a song bird in my future.

Portal is still on track, if I can ever get the boots I ordered for Chell’s long fall boots.  Shop.Cosplay.com worked really well and quickly for wig orders, but the footwear is taking forever.  Over 25 days and no updates or replies to emails.
We did get the jumpsuit and my lab coat from Amazon, Chell’s tank top, Aperture Science labels, and PotatOS from Thinkgeek, and some acrylic rods for the core from TAP Plastics.
The ASHPDs did get some more sculpting and a nice coat of primer too.

APHPD - Primed

The acrylic rods from TAP Plastics.IMAG0488

So now that Bioshock is out, does that mean we’re only doing one costume at Dragon*Con this year?  You should know better than that.

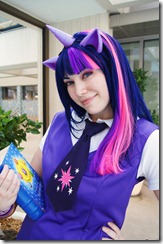
If you haven’t figured it out from earlier posts, Melinda and I are big fans of the cartoon My Little Pony:Friendship is Magic.  We thought it would be fun to do a costume from the show.  Now, when I say costume from the show, I do not mean full on fur suit character recreations.  While I admire the sewing skills of the people that create these, honestly, they just creep me out. A lot like clowns.  Just creepy.
NO

No, what we will be going for is along the lines of a more humanized pony form like this.
3073164

This is one of the best MLP cosplays I’ve come across and it is the main reference for what will be Melinda’s Twilight Sparkle costume.
I have all the pieces for the wig now.  A main “base” wig with several hair extension wefts that I will be weaving into the wig to created the tri-colored effect.
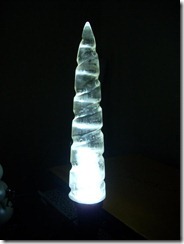
I haven’t decided how to create the ears just yet, but the horn is going to be special.  In the show, whenever Twilight uses her magic, her horn will glow.  Naturally, I wanted to create this effect.  Why?  Why not? 
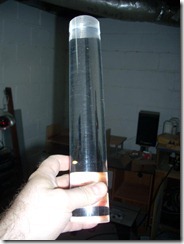
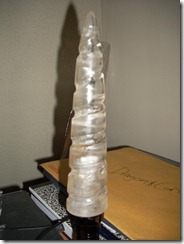
The order of acrylic rods from TAP Plastics did not just have the ASHPD cores, but it also contained what would become a Unicorn horn.

Original 2 inch x 12 inch rod
Original            
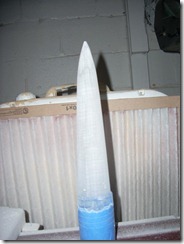
Shaped to a very dangerous missile shape
 Shaped

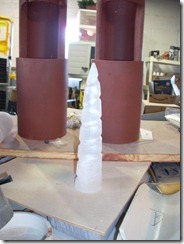
Grooved
Grooved

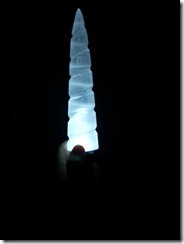
All lit up
Light up 1

Post flame polishing
Flame Polished

All lit up after flame polishing
Flame Polished - Lit

The entire horn will next be dyed to the correct shade of purple, cut to length, and wired with a simple LED and switch that Melinda can activate whenever she wants to do magic.

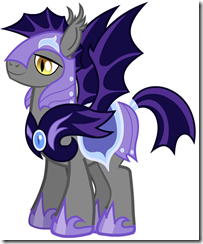
Admittedly, the show does not have a lot of male characters for me to choose from.  I could have gone the route others have taken and just made a male version of a female character, but again, the creepy scale started to tip on that idea.  So I decided to take on creating one of the Royal Guards’ costumes.  Not just any mind you, but one of the Royal Guards assigned to Princess Luna.
Luna's_Guard_by_TheHub

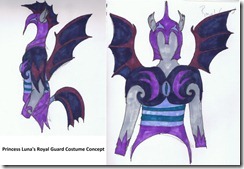
Why?  Look at him.  He is totally awesome, that’s why.  Based off the reference image above, I have made this drawing of the design I am going to build.
Princess Luna's Royal Guard Costume Concept

Yup, wings, tail and all.

We are also planning on using the Twilight Sparkle costume with the Chell costume to make a crossover costume one night just for kicks and giggles.  There may even be a “ponified” version of Doug Rattmann wandering around.  Why?  Because it is freaking fun to do. 

Speaking of ponies

What in the world was I thinking?  No, really, I think I totally lost my mind there for a while.  Deciding to build seven additional pony launchers like the Pinkie Pie Launcher and Tank Launcher from November, I must have been nuts.
DSCN0242

Still, I’m pushing through my insanity, and completing the job.  What will I do with all these?  Well, a few will make it down to Dragon*Con, others will be kept, some may end up as gifts to friends, and some may turn up on eBay.